Haha, yeah you’re still going to go a little insane removing the clear from your engine, but not “completely,” — if you follow these tips.
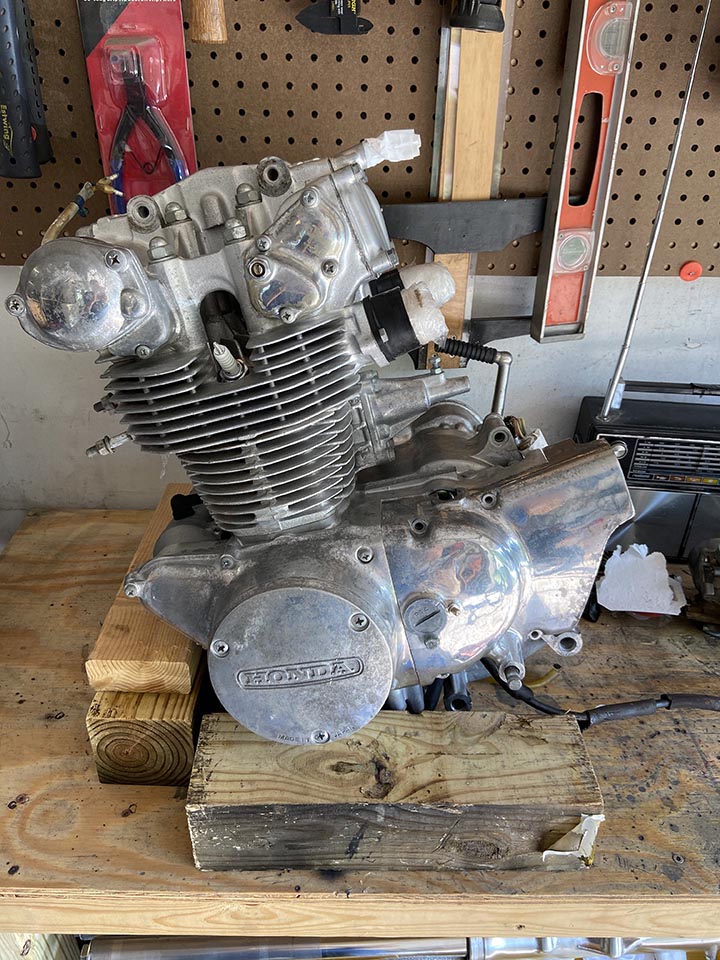
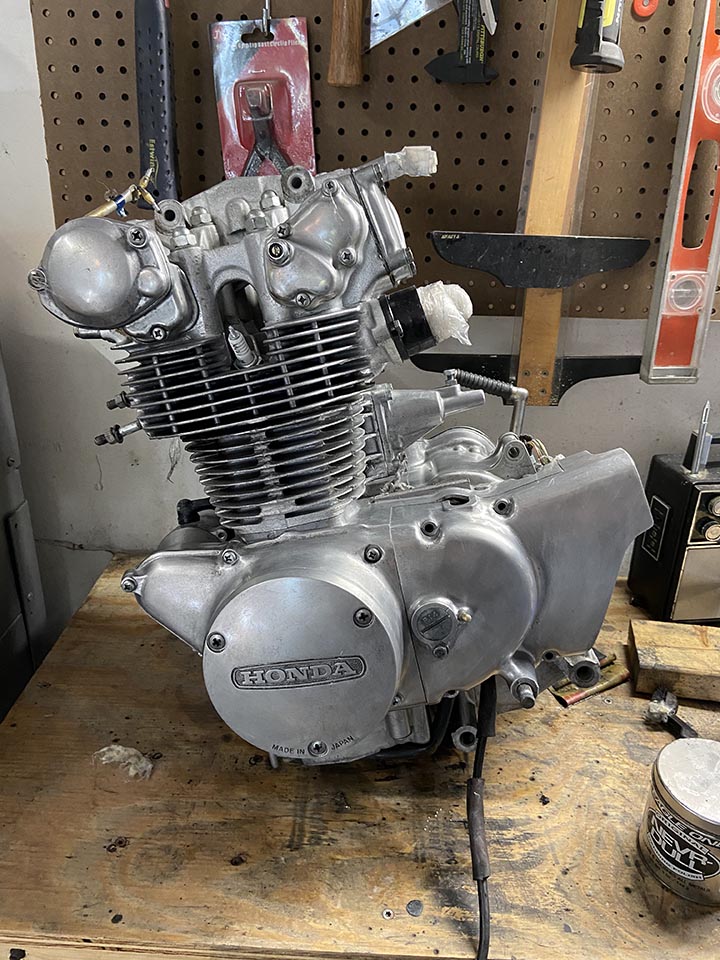
First off, let me reassure you that your effort will be worth it. You will not regret doing this. You will love the results and take your bike to the next level. Here are some before and after pictures from my most recent build. Note, this engine has not been polished yet. Keep an eye on the 1972 Honda CL450 Build Page for final pictures.
Step One: Remove the Clear Coat.
If you’re new to restoring old motorcycles, you’re going to be tempted to slather your motor up with aluminum polish and start buffing right away. Sorry, but it’s not going to work. The reason your engine looks bad is that your clear coat has worn off in spots and exposed the raw metal to corrosion. If it all wore off, and it didn’t, you could move onto the next step, but you can’t yet. First you need to remove the clear coat from your bike.
What You Need:
1. Big, Cheap Plastic Drop Cloth. Don’t spend a lot of money on this, You’re going to use a big piece to cover your motor and cut the rest up to shove into the holes in your engine so you don’t fill it with water
2. A Hose That Delivers a STRONG Stream of Water. I recommend a power washer.
3. Degreaser. I recommend Simple Green or Purple Power, but you can use straight Dawn dishwashing detergent if you prefer
4. Scrub Brush. I like the ones with the long handles. You’re going to bust your knuckles during the polishing process, might as give them a break until then
5. Cheep, Wooden Furniture Dolly. It’ll help you wheel your engine around without breaking your back
6. Inexpensive Bristle Paint Brush. Not foam
7. Gallon of Premium Paint and Epoxy Remover. Available at Home Depot
8. Duct Tape
START:
First. Remove your carburetors, then remove the engine from your frame and put it on your furniture dolly. Removing it from your frame will allow you to let some chemicals remove most of the clear for you without removing paint from the rest of your bike.
NOTE: It’s ok if you don’t want to remove your engine, but you’ll want to skip this step and move to the next step. You can remove the clear from the most visible and accessible parts of your engine without chemicals, sanding it off by hand, but the time and effort required will most likely drive you mostly insane. I get why pulling an engine sounds intimidating, but you really should get over it. It’s not like pulling a car engine. Plus, if your frame needs some love too, you aren’t going to want to work around the engine.
Second. Cut your painters drop cloth in half and cut the other half into 4-6 inch strips. Roll your plastic up into mini burrito looking wads and jam them into your intake and exhaust ports. Make sure they fit in there tight. Use your duct tape to seal up the hole where your tachometer mounts and the crankcase breather hole and any complex wiring plugs.
 Third: Degrease your engine. Don’t try to apply your stripper over grease and dirt. It will prevent your stripper from working properly and you’ll end up wasting a bunch, and it’s more expensive than degreaser. Slather it up with degreaser, loosen up the dirt with a scrub brush and powerwash the crap out of it. NOTE: With everything plugged up, you don’t have to worry a whole lot about power washing the snot out of it. With that said, try not to blast your wiring directly with the power washer — especially if they are fabric covered or insulated with foam. You can destroy the insulation. If you do, it’s an easy fix with a piece of shrink tube.
Forth: Dry it off. A lot of times I use air from my compressor to get water out of the fins and tight places when I wash it, even after stripping it. For some reason it seems like that the stripper doesn’t’ work as well when a part is wet.
Fifth: Pour a pile of stripper goop into a paper or plastic plate and glop it all over your engine. Use the bristles to get it into all of the cracks and between the fins. Glob it on, don’t be stingy on this part.
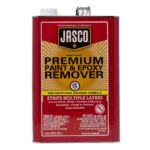 A NOTE ABOUT CHEMICAL STRIPPERS: So, I think I’ve tried them all. I used to use the Automotive Paint Sripper that you can buy from AutoZone. It works fine, but you’ll need more of it than you think and it can get expensive. I used to tell myself that the spray can was better than the brush-on stripper, but I was wrong. You save a little mess, but in the end, I suggest getting a big brush-on can of stripper. I was very pleased with the Premium Paint and Epoxy remover from Home Depot. It comes in spray on, but by the time you’re done you’ll spend just as much as the big gallon can, and the spray clan will clog over and over and drive you a bit insane. DO NOT USE CITRISTRIP. I get it, you want to take it easy on the environment, but it wont’ work on this project. It will just make you go insane trying.
Sixth: Wrap your engine tightly in the plastic drop cloth. This will keep it from evaporating. If you let it dry on there, you might as well start over. Now … here’s where I want you to break the rules printed on the can. Let it sit on the engine for at least an hour then remove the plastic. Use the bristles on the brush to agitate the stripper into the clear. If you spray it off now, you’ll get a lot off, but trust me on this. After you bristle up the entire engine glop your engine up again, adding a layer on top of the previous layer, then wrap it up again in plastic. Let it work for another hour, or you can even let it sit overnight, if you’re at the end of the day.
Seventh: Roll your engine out into the driveway. Stick something under the wheel so it doesn’t ghost ride down your driveway. Move your cars away, so they don’t get showered with paint stripper (for obvious reasons). Put on your safety goggles to protect your eyes. Then power wash like crazy. Your patience will pay off here as you watch large sheets of clear slide off the raw aluminum. It’s a great feeling. Now, you might be thinking, “I don’t really need a really strong stream of water to blow this stuff off.” Unfortunately, you’d be wrong. I’ve tried with water and a scrub brush instead. It just makes a sloppy mess and leaves you with residu and you’ll have to repeat it over and over again to remove it.
Eighth: You can repeat the process if you’d like, but in my experience only tiny, stubborn, crusty, bits of clear will still be hanging on for their lives. And, those bits will be weakened by the stripper enough to be easily removed in the next step.
By the way this is how I remove clear coat on all of the aluminum part on a motorcycle.
A FINAL NOTE. There are other ways to do this. This is what I do and the reason people ask me ” how did you do that?” — over and over. And this is the reason I’m taking the time to write the full process. If you are beginning a full rebuild of your engine, it’s best to just send your engine case off for vapor blasting and polishing. Unfortunately, a motor must be disassembled to do this.